
How To Pin A Boutonnière
HOW TO PIN A BOUTONNIÈRE
Confidence is key.
Although every couple is certainly different, quite often the bulk of preparing for a wedding seems to fall on the shoulders of the bride. Maybe it’s because *stereotypically* girls are the ones dreaming about their wedding day since being a little girl? Personally, this wasn’t me, but I know a lot of women who already have so many of their decisions made and ready to set in motion when they officially become engaged (if this is you, kudos to you - my details-loving-heart is envious of your planning skills!).
That being said, I’ve noticed a welcome trend of both parties becoming increasingly invested in the planning and decision making process. I think this is SO important in order to seamlessly craft a day that feels true to you as a couple and has elements of both personalities displayed throughout the day.
No matter what your involvement in the planning, as a guy, there are 3 main things I see the gentlemen struggle with on their wedding day that can really be easily avoided with a little bit of pre-wedding prep. After all, no one likes to add any more stress or reasons for sweaty palms on their wedding day!
What are these tricky day of activities you ask?
Pinning Boutonnières. Folding Pocket Squares. Tying ties or bowties.
Always and forever.
Without fail, at every wedding, someone is on their phone looking up tutorials, graphics, and videos about how to do these things. Learn them beforehand and you will be well on your way to being a well-prepared Groom. Promise.
The more control you feel you have over the little things that happen during the day, the more you will be truly in the moment enjoying the celebration.
Let’s get pinning!
First things first: you’ll want to make sure you understand what the lapel is, as this is where we will be pinning the boutonniere:
la·pel /ləˈpel/
noun
the part on each side of a coat or jacket immediately below the collar which is folded back on either side of the front opening.
Now that we have that squared away, here are the basic steps:
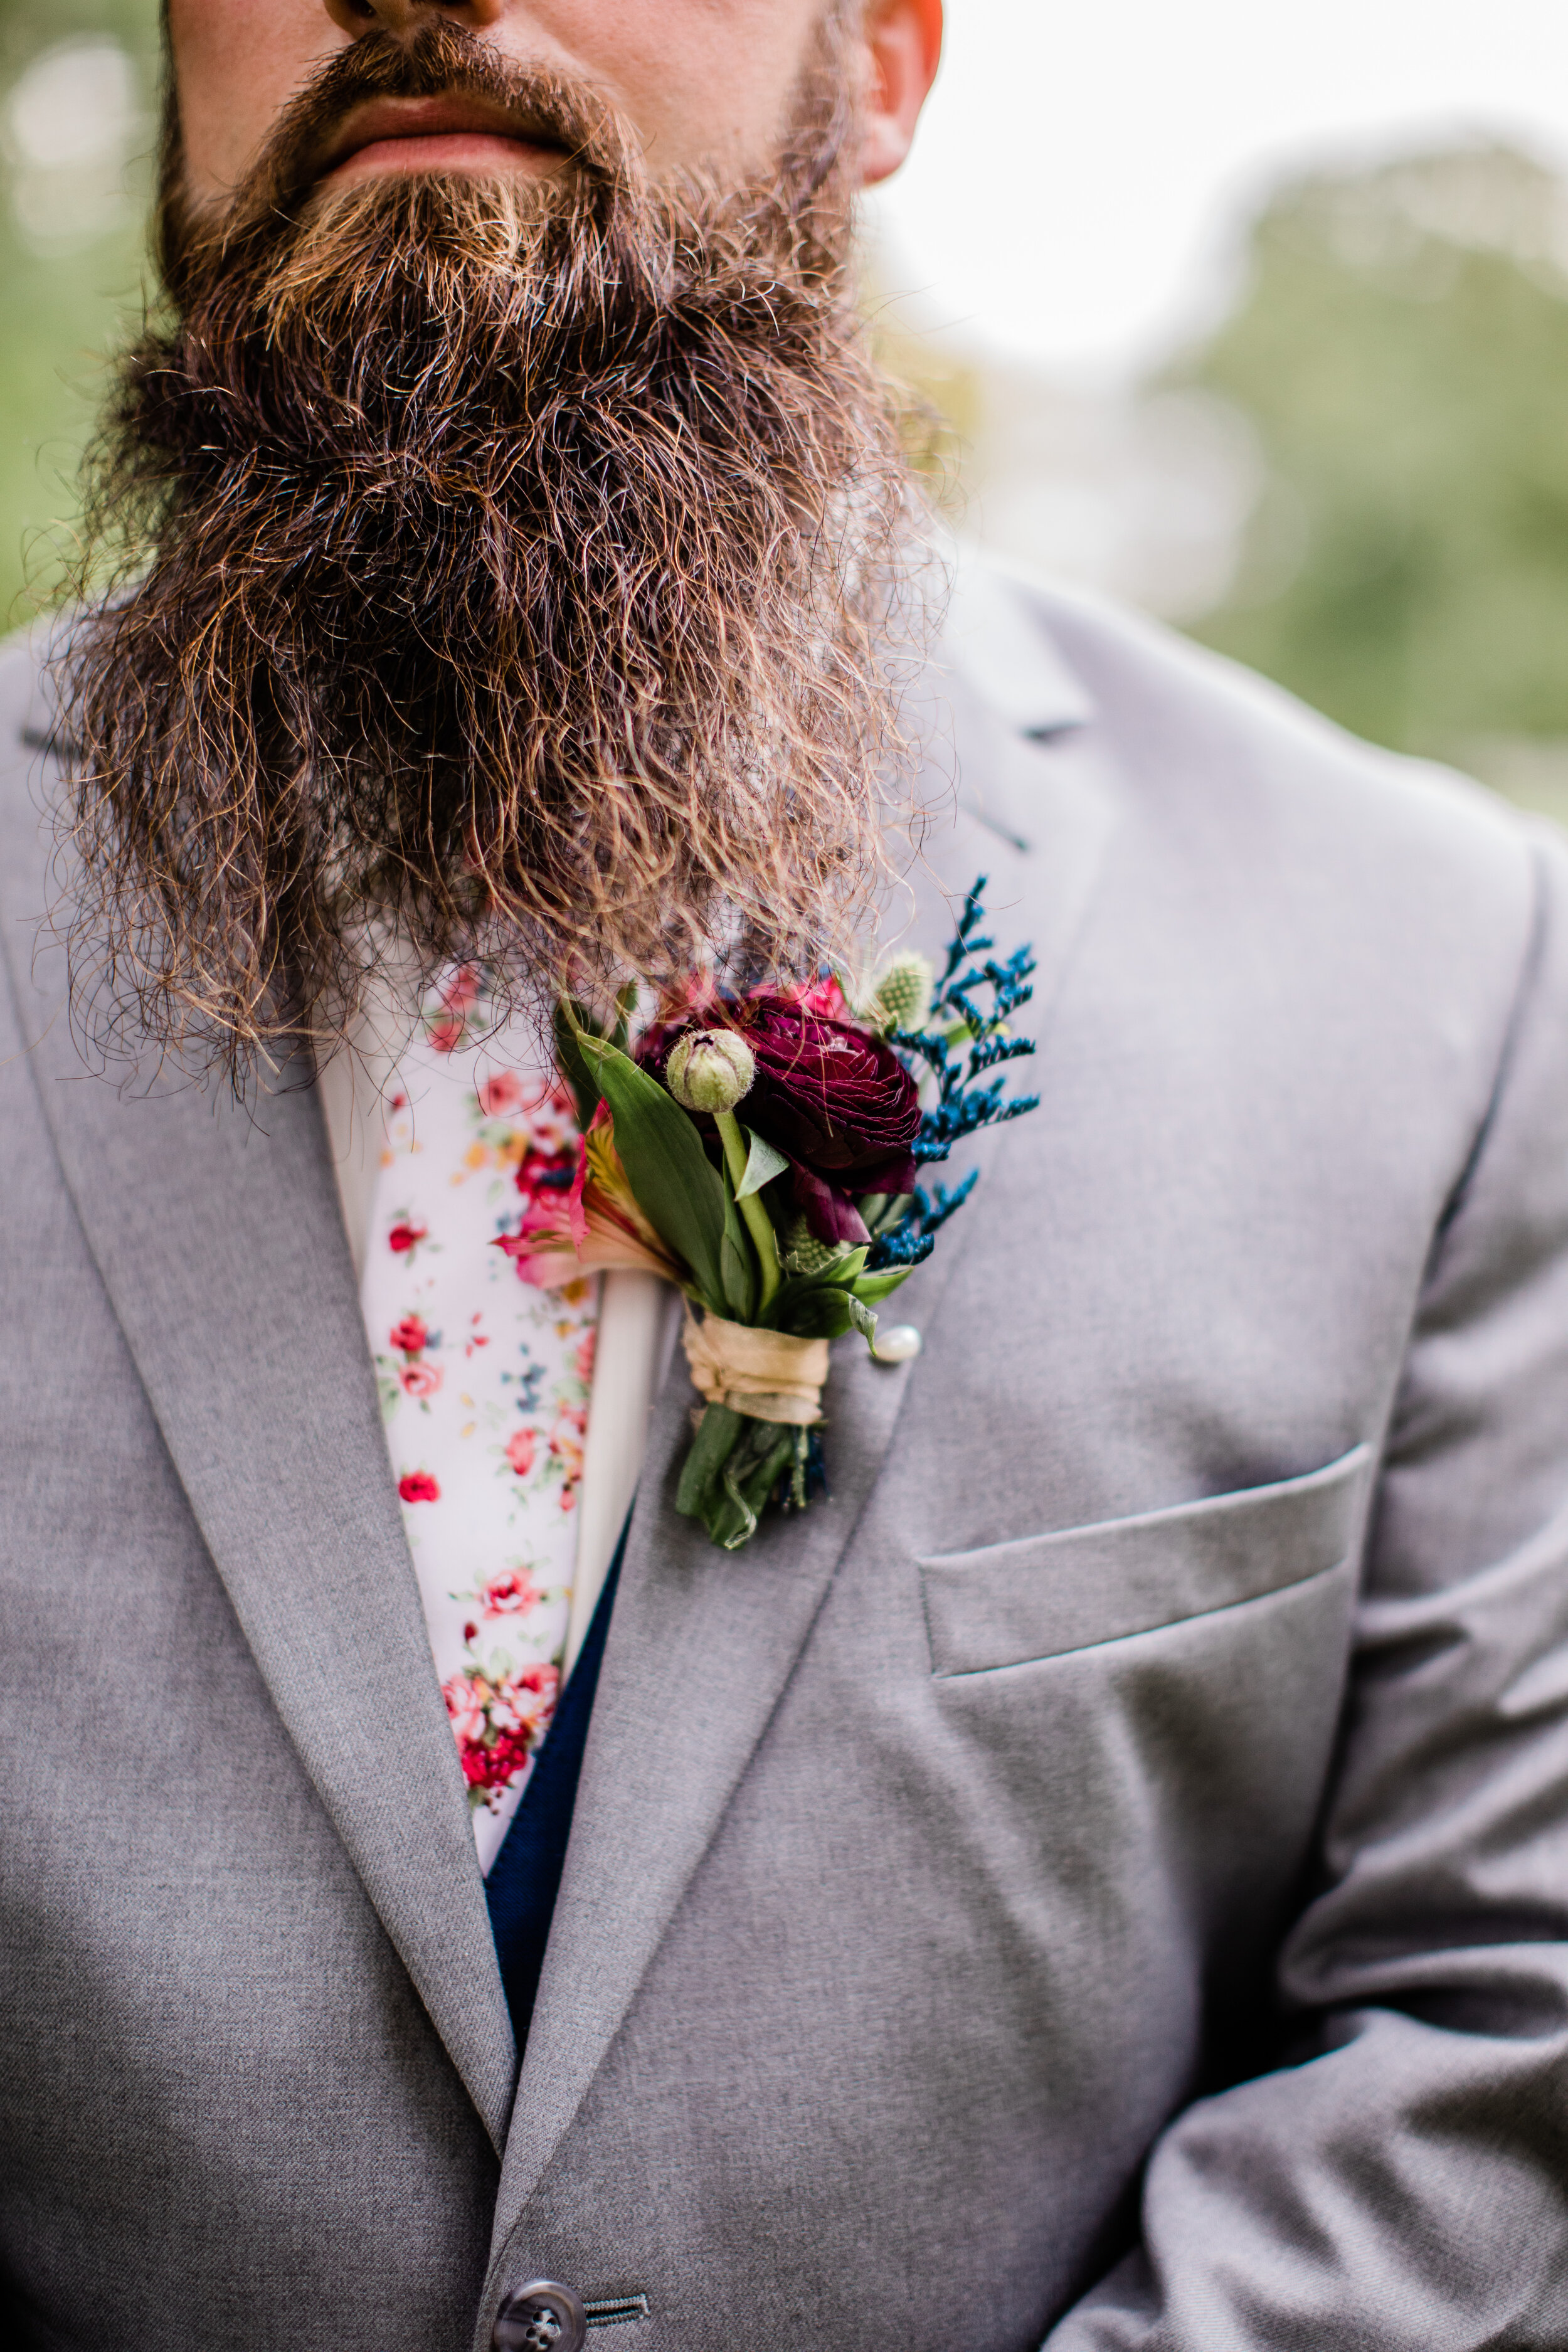
On the left lapel, start with your first pin (you’ll need two in total to secure properly for an entire day of celebrating). Beginning from behind the lapel approximately where the top of the stem begins, poke the pin through the fabric and boutonnière and come back down through the fabric of the suit to come out on the back side of the lapel again. It will depend on the style and design, but most flowers will have some type of fabric holding the little magical bunch together.
Taking your second pin, repeat this process again, starting also around the top of the stem. The goal is to form a bit of an X shape with the pins!
Realistically, you (the Groom) will not be pinning the boutonnière onto your own lapel; however, you will be helping your guys!
End Goal
boutonnière with flower at the top
stem at the bottom
securely fastened with two pins forming the shape of an X
laying flat running parallel with the lapel.
If you’ve got those key elements you’re ready to party!


Cora is a wedding photographer based near Mystic, Connecticut, photographing love stories throughout New England (and beyond). Cora is a wife, mom and photographer and finds joy in relationships - with her husband, her daughter, family, friends, and couples. Her photographic style emphasizes warmth and romance experienced by genuine people in classic New England places. When on the road or in the air you will likely find her exploring Boston, Massachusetts; New Haven, Connecticut; Block Island, Rhode Island; Hudson Valley, New York; or New York City, New York. Learn More